Choosing the right drainage channel can determine whether a project stays dry, safe, and durable. Water rarely follows the neat path shown on a drawing. It gathers beside entrances, crosses loading areas, and collects where paving settles slightly. A suitable drainage channel must manage these realities, not just match a product photograph.
In my experience, the best selection begins with site conditions. Consider expected water volume, surface material, traffic loads, slope, and maintenance access. A channel beside a garden path faces different demands from one installed across a warehouse entrance. Small details matter. A narrow grate may clog quickly under falling leaves. A weak frame may crack beneath delivery vehicles. These failures are expensive and often avoidable.
Performance matters most.
Material choice also deserves careful attention. Polymer concrete, galvanized steel, stainless steel, and polymer channels offer different strengths, weights, costs, and resistance levels. Local weather and chemical exposure can change the decision. Coastal air, de-icing salts, and industrial residues may shorten a channel’s service life. Product ratings should be checked against the project’s actual loading conditions, installation method, and drainage design.
It is tempting to choose the cheapest option. That assumption can be wrong. A lower initial price may lead to frequent cleaning, damaged grates, or difficult replacement work. I have also seen projects overdesigned without clear evidence, adding cost without improving performance. The right answer usually comes from measured flow needs, reliable technical data, and advice from qualified drainage professionals.
Good drainage starts with observation. This guide explains how to compare drainage channel types, assess practical risks, and make a confident, evidence-based choice. Even experienced teams should review their assumptions before installation.
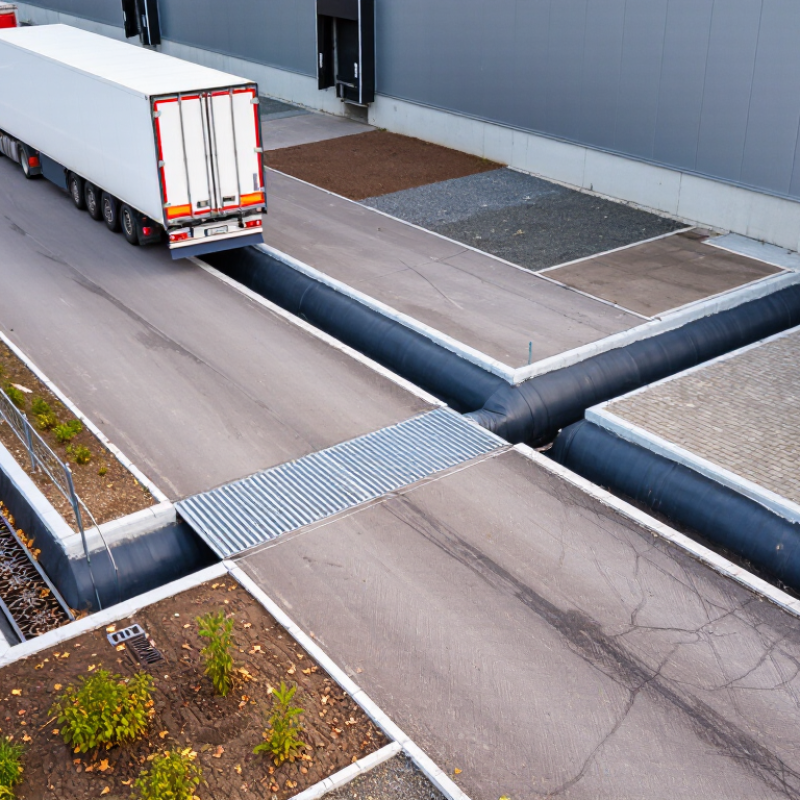
How to Choose the Right Drainage Channel for Your Project
Project Requirements and Drainage Objectives
Drainage design begins with the site, not the channel catalogue. Identify the catchment area, surface type, rainfall intensity, slope, traffic load, and discharge point. NOAA Atlas 14 provides location-specific rainfall estimates, including one-hour and 100-year storm events. A 100-year event means a one percent annual exceedance probability, not rainfall occurring once every century.
Calculate the expected flow before selecting channel width or depth. Hydraulic capacity depends on channel geometry, gradient, roughness, and outlet conditions. The IPCC Sixth Assessment Report states that heavy precipitation has increased in many regions. Future rainfall may exceed older design assumptions. That deserves attention. A design based only on historical averages can become inadequate.
Load requirements also shape the decision. Pedestrian areas need different structural performance from loading yards or road crossings. The ASCE 2021 Infrastructure Report Card rated stormwater infrastructure D, showing widespread system pressure in the United States. Select a suitable load class, secure the channel properly, and provide safe access for cleaning. Debris is not a minor detail. Leaves, sediment, and winter grit can reduce effective capacity quickly. In practice, maintenance access is often underestimated. A larger channel is not automatically better, because poor falls, weak outlets, or difficult cleaning can still cause flooding. Review the hydraulic model, inspect the finished installation, and revise assumptions where site conditions disagree.
Surface type directly affects drainage demand. The chart shows typical runoff-coefficient midpoints used in preliminary stormwater calculations. Higher values indicate that more rainfall becomes surface runoff, so the project may require greater channel capacity, more frequent inlets, or additional discharge controls. Final channel selection should also consider rainfall intensity, catchment area, slope, load class, debris exposure, and maintenance access.
How to Choose the Right Drainage Channel for Your Project
Site Conditions, Water Flow, and Environmental Factors
A drainage channel should match the ground, not just the drawing. Begin with a site walk after rainfall, when slopes and ponding areas become visible. Check soil strength, groundwater, freeze-thaw exposure, and access for cleaning equipment. Concrete may suit heavy traffic, while polymer or metal systems can work better where installation speed matters. Measure twice. Small errors matter.
Water flow determines channel width, depth, outlet design, and grate selection. Estimate the catchment area and peak rainfall, rather than relying on average weather data. A steep paved surface can send water toward the channel within minutes. The channel also needs enough slope for self-cleaning flow. Too little slope allows sediment to settle. Too much flow can damage outlets or create unsafe splashing. A drainage engineer should verify hydraulic calculations for complex sites.
Environmental conditions often change the specification. Coastal air can accelerate corrosion, while industrial runoff may require chemically resistant materials. Projects near streams need sediment controls during construction. Grates should prevent trip hazards and protect pedestrians, cyclists, and maintenance workers. I have seen designs fail because leaf buildup was ignored. That mistake is easy to prevent, but field conditions remain unpredictable. Recheck local rainfall records, discharge limits, and maintenance access before ordering materials.
Drainage channel performance depends on material, size, and load rating. Polymer concrete offers strong compression resistance and smooth hydraulic flow. Concrete suits large runs, heavy traffic, and demanding ground conditions. Polymer channels are lighter, but their joints still need careful alignment. Galvanized or stainless steel channels work well where shallow depth and frequent access matter. Material choice is not only about strength. Soil chemistry, freeze-thaw cycles, and maintenance access can change the result.
Size the channel from rainfall intensity, catchment area, slope, and outlet capacity. NOAA Atlas 14 supplies location-specific intensity-duration-frequency rainfall data for many United States regions. Do not use a generic “heavy rain” value. It can undersize the system. A 100-millimeter channel may handle a narrow walkway, while a loading yard may require a wider body, deeper profile, or multiple outlets. Hydraulic calculations should include blockage risk. Real grates collect leaves, gravel, and packaging debris.
Load ratings should match the finished surface, not only the channel body. EN 1433 classifies systems from A15, rated at 1.5 tonnes, to F900, rated at 90 tonnes. A pedestrian plaza may need A15, while vehicle lanes often require B125 or higher. Freight areas demand engineering review. The Federal Highway Administration’s HEC-22 guidance supports using local rainfall and roadway drainage calculations.
Field checks still matter. I have seen excellent calculations fail because the outlet sat too high. That detail is easy to miss. Recheck it.
How to Choose the Right Drainage Channel for Your Project
Installation details should guide the channel selection, not appearance alone. Measure the fall accurately, then provide a stable, continuous slope toward the outlet. Poor grading can leave water beside the grate, especially near door thresholds. Construction Industry Institute research commonly places rework at 5–15% of project cost. Small installation errors become expensive later.
Accessibility needs equal attention. The 2010 ADA Standards limit floor and ground surface openings to 13 millimeters. Elongated openings should cross the direction of travel. Choose a narrow, secure grate for entrances, walkways, and wheelchair routes. Test it with a mobility device before final approval. That practical check is often missed.
Maintenance access is just as important. Select removable grates, visible outlets, and inspection points that workers can reach safely. The U.S. Environmental Protection Agency recommends routine inspection and debris removal for stormwater controls. In practice, leaves, sediment, and litter collect fastest near low points. Plan cleaning after heavy rain, not only during annual servicing. I would also document the first inspection, because design assumptions can look different after real weather.
| Drainage Channel Type | Best-Fit Applications | Typical Installation Details | Recommended Access Arrangement | Typical Load Class | Hydraulic and Slope Considerations | Maintenance Needs | Accessibility and Surface Considerations |
|---|---|---|---|---|---|---|---|
| Polymer Concrete Channel with Grating | Commercial courtyards, parking areas, service yards, loading zones, and industrial floors where high strength and dimensional stability are required. | Set the channel on a designed concrete bed and provide a concrete surround suitable for the traffic loading. Connect joints securely and install the outlet before final surfacing. | Use removable grates and provide access at outlets, changes in direction, junctions, and other points where blockage inspection may be required. | A15–D400 | Common channel depths and widths vary by hydraulic design. Provide a continuous fall where possible; confirm capacity using rainfall intensity, catchment area, and outlet restrictions. | Remove sediment, leaves, and litter from the grate and channel. Inspect after heavy storms and check joints, outlets, and frame seating periodically. | Select heel-safe and slip-resistant grating for pedestrian zones. Ensure the finished grate is level with the adjacent pavement to reduce trip hazards. |
| HDPE or Polypropylene Channel | Residential driveways, landscaped areas, patios, walkways, light commercial areas, and projects requiring lightweight components. | Install on a stable, compacted base with the specified concrete support. Allow for thermal movement where required and protect the channel from construction debris. | Provide removable grates at practical cleaning points. Add inspection boxes or rodding access where long runs, bends, or restricted outlets make cleaning difficult. | A15–C250 | Suitable for many shallow drainage applications, but the outlet size and available fall must be checked against the expected flow. Avoid low points that can retain sediment. | Usually requires routine grate cleaning and occasional flushing. Check for deformation, displaced sections, blocked outlets, and damage from vehicles or landscaping equipment. | Choose narrow-slot or fine-mesh covers where pedestrian comfort and small-wheel accessibility are important. Confirm that the cover opening complies with the project requirements. |
| Stainless Steel Channel with Grating | Food preparation areas, commercial kitchens, washdown rooms, healthcare facilities, and hygienic internal environments. | Install with accurately formed falls toward trapped outlets. Seal connections as required, maintain hygienic junctions, and coordinate the channel with the waterproofing and floor finish. | Use removable grates or solid access covers at outlets and inspection points. Provide accessible traps or baskets where solids and grease may enter the drainage system. | A15–B125 | Floor falls commonly direct surface water toward the channel; the required gradient depends on the floor layout and drainage design. Confirm outlet capacity during peak washdown conditions. | Clean grates and sediment baskets frequently. Wash down the channel, inspect seals and welds, and remove grease or organic deposits using procedures compatible with the installation. | Use a flush, slip-resistant, corrosion-resistant cover. Avoid sharp edges and select a grate pattern that supports safe movement of carts, trolleys, and pedestrians. |
| Slot Drain | Architectural entrances, pedestrian plazas, balconies, pool surrounds, and locations where a discreet drainage line is preferred. | Requires accurate setting-out and careful alignment with the finished surface. Install the body and outlet system on the specified structural support and protect the narrow slot during paving. | Provide cleaning access at outlets, end caps, junctions, and suitable intervals along long runs. Access tools may be required for narrow openings. | A15–C250 | The narrow opening does not determine hydraulic capacity by itself; outlet spacing, internal channel size, and longitudinal fall must be designed for the expected flow. | Inspect the slot for fine sediment and litter. Flush the channel and clean catch points regularly, especially where surrounding paving sheds sand or organic debris. | Offers a low-visibility profile and good wheelchair compatibility when correctly installed. Confirm slot width, edge treatment, slip resistance, and level tolerances. |
| Heavy-Duty Trench Drain with Ductile Iron Grating | Roads, logistics yards, bus areas, industrial compounds, workshops, and locations subject to frequent heavy vehicle traffic. | Use a reinforced concrete surround designed for the site loading. Anchor and secure the frame, coordinate construction joints, and protect the channel from differential settlement. | Provide robust removable grates, silt baskets, and access points at outlets, junctions, and changes in direction. Ensure covers can be safely removed for inspection. | C250–F900 | Choose the channel width, depth, outlet arrangement, and fall from a hydraulic calculation. Higher load classes do not automatically provide greater drainage capacity. | Schedule regular vacuuming or high-pressure cleaning where permitted. Inspect grates, bolts, frames, concrete surrounds, and outlets for impact or settlement damage. | Use securely retained, anti-slip grates. For pedestrian crossings, select an opening pattern that prevents heel or small-wheel entrapment and maintain a flush transition. |
| Drainage Channel with Silt Basket or Debris Trap | Car parks, landscaped developments, workshop entrances, external washdown zones, and sites where sediment or leaves are expected. | Install the basket or trap beneath an accessible catch point. Provide enough clearance for removal, and coordinate the unit with the channel invert and downstream pipework. | Access is provided directly through a removable grate or cover. Position the trap where maintenance staff can safely reach and lift the basket. | A15–D400 | Traps improve solids interception but reduce available storage volume as they fill. Size the outlet and maintenance frequency so the trap does not become a hydraulic restriction. | Empty the basket before it reaches its effective capacity. Inspect after storms, remove accumulated sediment, and verify that the downstream outlet remains clear. | Use a lockable or securely seated cover in public areas. Keep the access cover flush with the surface and provide safe working space for maintenance. |
| Permeable or Infiltration Drainage Channel | Sustainable drainage layouts, landscaped pedestrian areas, rainwater management zones, and sites with suitable ground infiltration conditions. | Install over a properly graded, clean stone reservoir or infiltration layer as required by the design. Prevent fine soil migration with suitable geotextile detailing where specified. | Provide inspection points, cleanouts, or openable covers at inlets, outlets, and monitoring locations. Include overflow routes for rainfall exceeding the design event. | A15–B125 | Performance depends on verified soil infiltration, groundwater conditions, storage volume, and local rainfall criteria. The system should not be used without site-specific infiltration assessment. | Remove leaves and sediment from inlet zones. Inspect infiltration performance, clean pre-treatment components, and check for standing water or signs of clogging. | Use accessible grates and stable surrounding surfaces. Keep inspection covers level and provide a clear route for maintenance without damaging planted areas. |
Choosing the right drainage channel starts with site conditions, not the lowest quoted price. On a recent site review, a narrow channel looked economical but collected leaves quickly. Cleaning became frequent after heavy autumn rain. That small detail changed the maintenance budget.
Polymer concrete channels usually offer strong load resistance and stable dimensions. Galvanized steel can be lighter and easier to handle, but coatings may need inspection in harsh environments.
Plastic systems often reduce installation time and transport costs. However, exposure to sunlight, chemicals, or vehicle traffic can affect long-term performance.
Compare the full lifecycle cost, including excavation, bedding, grates, cleaning, repairs, and replacement. The cheapest purchase is rarely the cheapest system.
Match the channel’s load rating to real use, including delivery trucks and occasional misuse. Check outlet capacity, slope, rainfall intensity, and access for maintenance. Details matter.
I have sometimes focused too heavily on material strength and underestimated sediment buildup. That was a poor assumption.
Ask installers for local performance records, installation tolerances, and warranty conditions. A channel installed on weak bedding may crack or shift, regardless of its advertised rating. Seasonal inspections also reveal blocked outlets, damaged grates, and standing water before these problems become expensive.