How to Install an Underground Drainage Pipe for Effective Water Management
In the realm of effective water management, the installation of an underground drainage pipe is a crucial step that often goes overlooked. Expert civil engineer, Dr. James Holloway, emphasizes the importance of proper drainage systems, stating, “A well-installed underground drainage pipe can prevent flooding and protect property from water damage.” As urban areas continue to expand, the challenges of managing excess water become increasingly critical, making the installation of these systems a necessary consideration for homeowners and developers alike.
The process of installing an underground drainage pipe may seem daunting at first, but with the right knowledge and tools at hand, it can be achieved successfully. Proper planning and execution are key components in ensuring that the drainage system functions effectively. By understanding the critical factors involved in this process, individuals can take proactive measures to safeguard their properties from potential water-related issues. With insights from experts like Dr. Holloway, homeowners can gain a clearer understanding of the benefits and techniques involved in implementing an underground drainage pipe, leading to more sustainable and effective water management solutions.
Understanding the Importance of Underground Drainage Systems
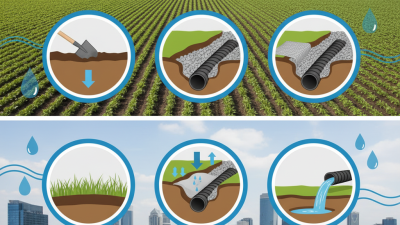
Underground drainage systems are essential for effective water management, particularly in regions prone to heavy rainfall and flooding. Studies indicate that urban areas can experience a 20% to 50% increase in runoff due to impervious surfaces like concrete and asphalt. This runoff can lead to serious water accumulation issues, resulting in damage to properties, increased erosion, and even the contamination of local waterways. By installing an underground drainage pipe, homeowners can significantly mitigate these risks, directing excess water away from foundations and critical landscape areas.
Tip: Prior to installation, it’s crucial to assess your property’s specific drainage needs using tools like a soil percolation test. This can help determine the ideal positioning of pipes to ensure optimal efficiency.
Moreover, underground drainage systems contribute to sustainable water management practices. The effective diversion of stormwater helps replenish groundwater supplies, an essential resource for many communities. According to the U.S. Environmental Protection Agency (EPA), implementing proper drainage can reduce pollutants in nearby bodies of water by up to 80%, showcasing the environmental benefits of these systems.
Tip: Regular maintenance of underground drainage systems, such as clearing debris and checking for blockages, can prolong the lifespan of the system and enhance its performance.
How to Install an Underground Drainage Pipe for Effective Water Management
| Step |
Description |
Tools Required |
Estimated Time |
| 1 |
Plan the drainage layout and mark the area. |
Marker flags, measuring tape |
1 hour |
| 2 |
Dig the trench for the pipe. |
Shovel, excavator (if necessary) |
2-4 hours |
| 3 |
Install the drainage pipe, ensuring proper slope. |
Drainage pipe, connectors |
1-2 hours |
| 4 |
Cover the pipe with gravel for drainage. |
Gravel, trowel |
1 hour |
| 5 |
Fill in the trench and compact the soil. |
Compactor, shovel |
1-2 hours |
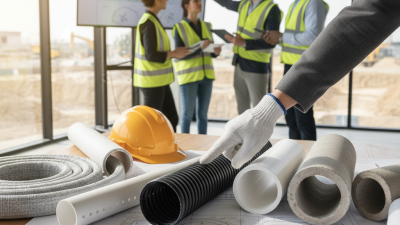
Choosing the Right Materials and Tools for Installation
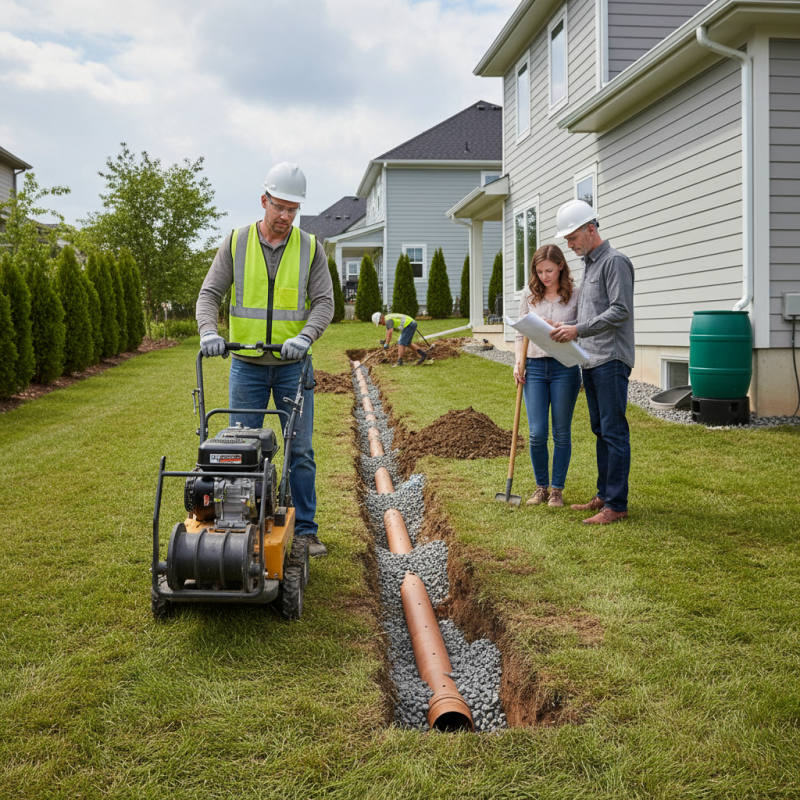
Choosing the right materials and tools for installing an underground drainage pipe is crucial for ensuring effective water management. First, consider the drainage pipe itself. Typically, PVC (polyvinyl chloride) pipes are favored for their durability and resistance to corrosion, while perforated pipe systems are ideal for allowing water to seep through. Additionally, using an appropriate pipe diameter is essential; larger diameters are suitable for areas with high water accumulation, whereas smaller ones can suffice for lighter drainage needs.
In addition to the pipes, you'll need a variety of tools to facilitate the installation process. A trenching shovel will help you dig the necessary trenches to lay the pipes, while a level ensures that the pipes are installed at the correct slope for effective drainage. You might also require a saw for cutting the pipes to the desired lengths, as well as fittings and connectors to join sections together securely. Don’t forget about materials like gravel or rock, which are essential for backfilling the trenches and providing proper drainage around the pipes. By carefully selecting the right materials and tools, you can significantly enhance the longevity and efficiency of your underground drainage system.
Step-by-Step Guide to Planning Your Drainage Layout
Planning an effective drainage layout is crucial for managing water flow and preventing damage to your property. Start by assessing the area where you intend to install your drainage system. Consider the natural slope of the land, as this will guide you in determining the optimal path for the pipes. Mark the drainage line on the ground, ensuring that it directs water away from your home and towards a designated drainage point, such as a storm drain or a dry well. Pay attention to the existing vegetation and landscape features, as these can impact water movement and affect your drainage strategy.
Next, it’s essential to calculate the size of the drainage pipes needed for your system. This involves evaluating the volume of water that needs to be managed, which may vary depending on the local climate and soil conditions. Use a level to ensure that your drainage line maintains a consistent slope; typically, a drop of 1-2% is recommended to facilitate proper water flow. Additionally, consider creating catch basins at low points in the layout to collect excess water effectively. By carefully planning your drainage layout, you can enhance water management around your property, minimizing the risk of flooding and erosion.
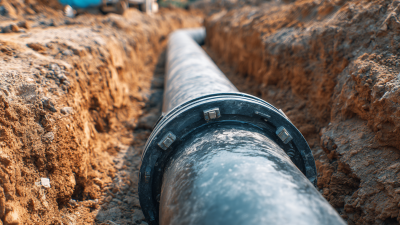
Installing the Pipe: Techniques and Best Practices
When installing an underground drainage pipe, it's crucial to follow best practices to ensure effective water management. Begin by selecting the right location for your drainage system. Look for areas where water tends to pool or where excess moisture is a frequent issue. Once you've identified the terrain, it's essential to dig a trench that is at least twice the width of your pipe and deep enough to allow for the proper slope—ideally a gradual decline of 1% to 2% for effective drainage.
Tips: Before you begin, check the local regulations regarding drainage systems, as certain areas might have specific guidelines. It's also beneficial to mark underground utilities to prevent any accidents during installation.
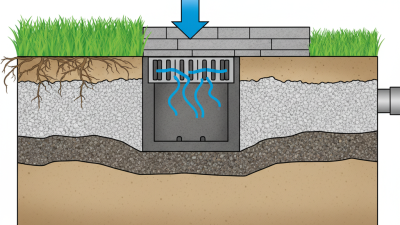
As you lay the drainage pipe, make sure to place it on a bed of gravel to help facilitate water flow. Additionally, ensure all joints are securely connected and consider using geotextile fabric to prevent soil from clogging the pipe. After the pipe is laid, backfill the trench with soil, but first, cover the pipe with gravel to provide extra protection and improve its efficiency.
Tips: Always test the installed drainage system by running water through it to verify there are no blockages and that it effectively directs water away from problem areas. Regular maintenance checks can also extend the lifespan of your drainage system.
Water Management Techniques: Effectiveness Comparison
Maintaining Your Underground Drainage System for Longevity
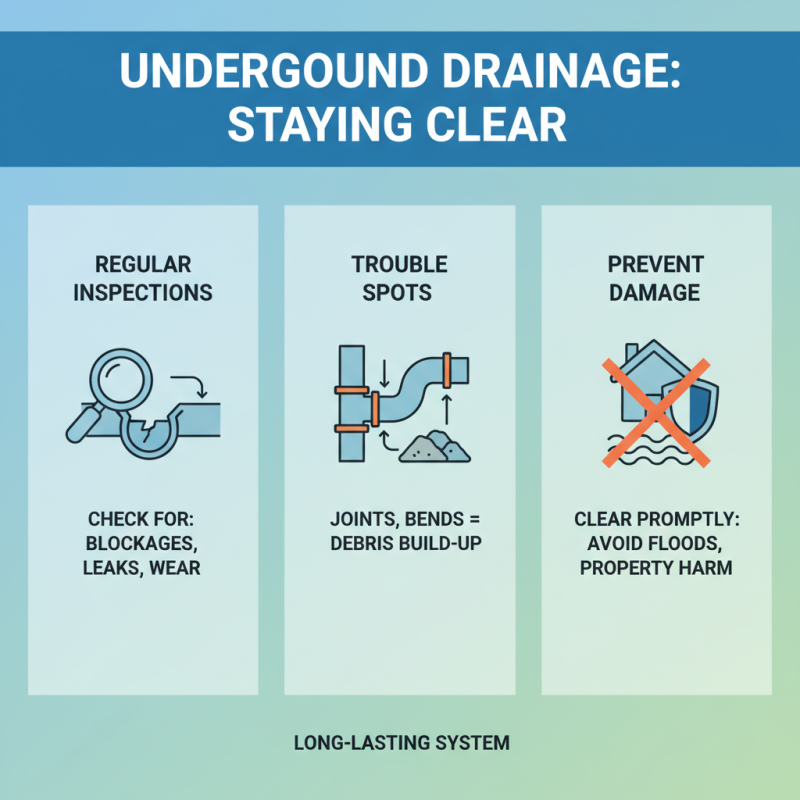
Maintaining your underground drainage system is essential for ensuring it functions effectively and lasts for many years. Regular inspections should be conducted to identify any blockages, leaks, or signs of wear. Pay close attention to common trouble spots, such as joints and bends, where debris can accumulate. It’s crucial to clear these areas promptly to prevent flooding and potential damage to your property.
Tips: Consider establishing a seasonal maintenance schedule. In spring and autumn, check for fallen leaves and other debris that may clog the drainage pipes. Additionally, it’s wise to evaluate the surrounding landscaping to ensure that there are no new plants or roots encroaching on the drainage system.
Another important aspect of maintenance is to monitor water flow. If you notice that water is not draining as it should, it may indicate a blockage or a more serious issue. Utilize tools like a drainage rod to clear minor obstructions and ensure that the water is flowing freely. This proactive approach can save you from more extensive repairs down the line.